Raspberry Pi + RTL SDR dongle = APRS Rx only gate (Part one – FM Radio)

Introduction
I have couple of raspberry pi’s laying around doing nothing useful. I decided it’s time to use it better than dust collectors. This tutorial is placed here for reference for any OM who would like to setup APRS Rx only node based on R.pi. Here’s what you’ll need (hardware):
- Raspberry Pi (I have model “B”)
- At least 4GB SD card
- PC running windows
- RTL USB DVBT Dongle
- 5V USB power supply (or powered USB hub)
… and software:
- RASPBIAN Debian Wheezy
- Win32DiskImager
- and other, installed directly from r.Pi
Preparation
I searched web for instructions and I found nice step-by-step tutorial here: http://www.algissalys.com/index.php/amateur-radio/88-raspberry-pi-sdr-dongle-aprs-igate
1. download RASPBIAN Debian Wheezy:
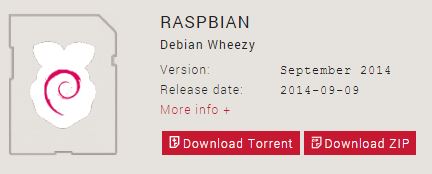
It’s 900MB+ image and you may consider P2P torrent for downloading. It has huge seed pool.
After downloading it’s tme to write the disk image to your SD card.
2. Download and install the Win32Diskimager software http://sourceforge.net/projects/win32diskimager/files/latest/download
3. Extract the RASPBIAN Debian Wheezy *.zip image to a directory. It is one single file with .img extension.
4. Format your SD card to FAT32
5. Run Win32Diskimager and select *-wheezy-raspbian.img from the directory where you extracted it.
6. Select your SD drive letter for the “Device” and write the image. Confirm overwrite warning and wait about 10 minutes, depending on your SD card speed.
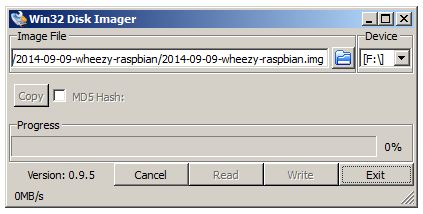
7. Writing image should finish with “Write successfull” info

8. Plug the card in the Raspberry Pi, plug the LAN cable and power-up the fruit
9. Find the IP of your raspberry. How do you manage this depends on your LAN configuration. I have m0n0wall and it’s easy to check the IP of any device in DHCP lease table:

DHCP assigned IP address 192.168.1.192.
10. Start your favourite SSH client and connect to Raspberry Pi. I am using TeraTerm

Login to your Pi with:
Login: pi
Password: raspberry
11. Expand filesystem
sudo raspi-config |
and select option 1: Expand filesystem
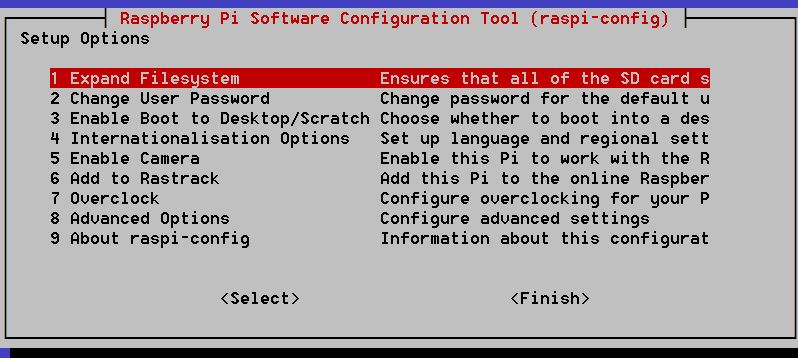
12. Select Finish and when asked for reboot select Yes.
Update, configure and install
13. You should have internet connectivity, then update the pi
sudo apt-get update sudo apt-get upgrade sudo apt-get dist-upgrade sudo rpi-update sudo reboot |
This will take more than 10 minutes
14. Remove Pulse audio
sudo apt-get remove --purge pulseaudio sudo apt-get autoremove rm -rf /home/pi/.asoundrc /home/pi/.pulse sudo reboot |
15. Edit /etc/modprobe.d/raspi-blacklist.conf
sudo nano /etc/modprobe.d/raspi-blacklist.conf |
and add the three lines to the end of the file to prevent the OS from loading the default drivers for the dongle
# blacklist spi and i2c by default (many users don't need them) blacklist spi-bcm2708 blacklist i2c-bcm2708 blacklist snd-soc-pcm512x blacklist snd-soc-wm8804 # dont load default drivers for the RTL dongle blacklist dvb_usb_rtl28xxu blacklist rtl_2832 blacklist rtl_2830 |
Finish editing with Ctrl-O and Ctrl-X
16. Reboot
sudo reboot |
17. Create new directory for the RTLSDR software, install new driver and the software
mkdir ~/rtl cd ~/rtl sudo apt-get install git build-essential cmake libusb-1.0-0-dev sudo git clone git://git.osmocom.org/rtl-sdr.git cd rtl-sdr sudo mkdir build cd build sudo cmake .. -DINSTALL_UDEV_RULES=ON sudo make sudo make install sudo ldconfig |
18. Install Sox
sudo apt-get install sox |
Connect and test the RTL dongle
19. Run rtl_test
pi@raspberrypi ~ $ rtl_test |
The response should be something like this:
Found 1 device(s): 0: Realtek, RTL2838UHIDIR, SN: 00000030 Using device 0: Generic RTL2832U OEM Found Elonics E4000 tuner Supported gain values (14): -1.0 1.5 4.0 6.5 9.0 11.5 14.0 16.5 19.0 21.5 24.0 29.0 34.0 42.0 Sampling at 2048000 S/s. Info: This tool will continuously read from the device, and report if samples get lost. If you observe no further output, everything is fine. Reading samples in async mode... lost at least 28 bytes Samples per million lost (minimum): 0 |
20. Now you can tune to your local FM radio
Change the frequency to your favourite local station.
rtl_fm -M wbfm -f 90.9M | play -r 32k -t raw -e s -b 16 -c 1 -V1 - |
Don’t forget earphones 🙂 Now you have multiband radio player.
21. Connect proper 2m antenna and tune to APRS frequency (in Europe it’s 144,8MHz):
rtl_fm -M fm -f 144.800M | play -r 24k -t raw -e s -b 16 -c 1 -V1 - |
you should hear APRS packets.
—=== This is the end of part one ===—
Stay tuned for more (RTL calibration and installing multimon software and the python APRS igate script).
Hello Om, could not find your name on the website.
Everything went like clockwork. Easiest install I have tried.
Both rtl_fm on broadcast and on local APRS frequency 145.175 in Australia looks like is working but no sound
I did not go further and install the decoder yet.
I know very little about Linux. Running Raspbian jessie latest version Sept. 24 2015 on Raspberry pi 2. and Bitvise xterm client
I did remove pulseaudio (was not installed) What handles audio now? I have HDMI TV plugged in which has working audio form other experiments.
Thanks for providing this excellent tutorial and hopefully helping me over the last little hurdle
73 Bob vk2byf
Hi!
Glad to see it helpful.
My name is Marko.
73 & GL
Hi Marko
Any ideas why I cant hear anything on the audio socket or the HDMI output to the TV?
Bob
Hi Bob
You have to force audio output via HDMI with
sudo amixer cset numid=3 2
change back to 3,5mm jack with
sudo amixer cset numid=3 1
Or do it via config tool
sudo raspi-config
under advanced settings, audio output
Hope this helps.
Marko
Hi Marko
sudo amixer cset numid=3 1 worked
Thank you very much
Now to install the rest and see.
I’ll let you know
Bob